

Install and open Ando
- Download Ando for your Mac.
- Open the
.dmgfile in your Downloads folder. - Drag Ando into Applications, then open Ando from there.
- Sign in to your workspace.
Which Mac download should I choose?
Which Mac download should I choose?
Open the Apple menu → About This Mac. If Chip shows an Apple
M-series chip, choose Mac – Apple Silicon. If Processor shows Intel,
choose Mac – Intel.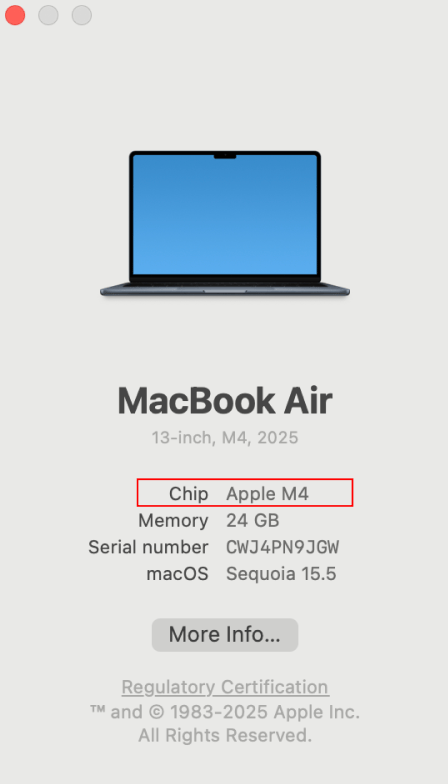
Get your Mac ready
Ando walks you through three permissions when you first sign in. Each one turns green and shows Enabled when it’s ready. Permissions you’ve already allowed are checked for you.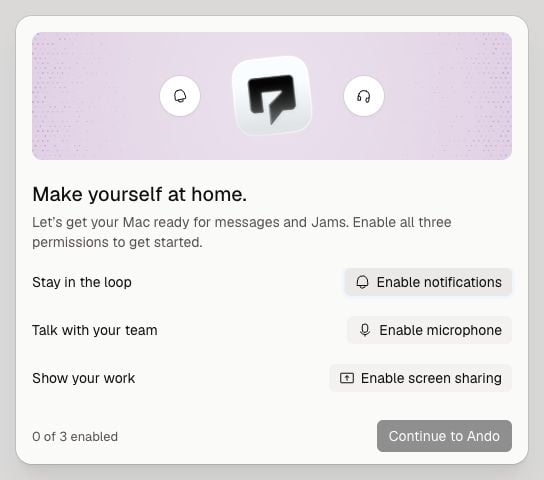
Your setup screen shows what’s ready and what to enable next.
1
Stay in the loop
Select Enable notifications so you can see messages and Jam invites.
Allow notifications when your Mac asks.If Ando opens System Settings, turn on Allow notifications for Ando
and choose Banners or Alerts. Then return to Ando.
2
Talk with your team
Select Enable microphone, then allow access when your Mac asks.
This lets people hear you in a Jam.
3
Show your work
Select Enable screen sharing. In System Settings, turn on Ando under
Privacy & Security → Screen & System Audio Recording.This lets you share a screen or window in a Jam. You still choose when
to share and what to show.
4
Finish setup
If you see Restart and finish setup, select it. Ando saves your place
and checks your permissions again when it opens. Restarting ends any
active Jam.Once all three permissions show Enabled, select Continue to Ando.
All three are required to finish Mac setup.
If you selected “Don’t allow”
You can change your choice in your Mac’s System Settings. Open it from the Apple menu in the top-left corner of your screen.Turn notifications back on
Turn notifications back on
Go to Notifications → Ando. Turn on Allow notifications, then
choose Banners or Alerts.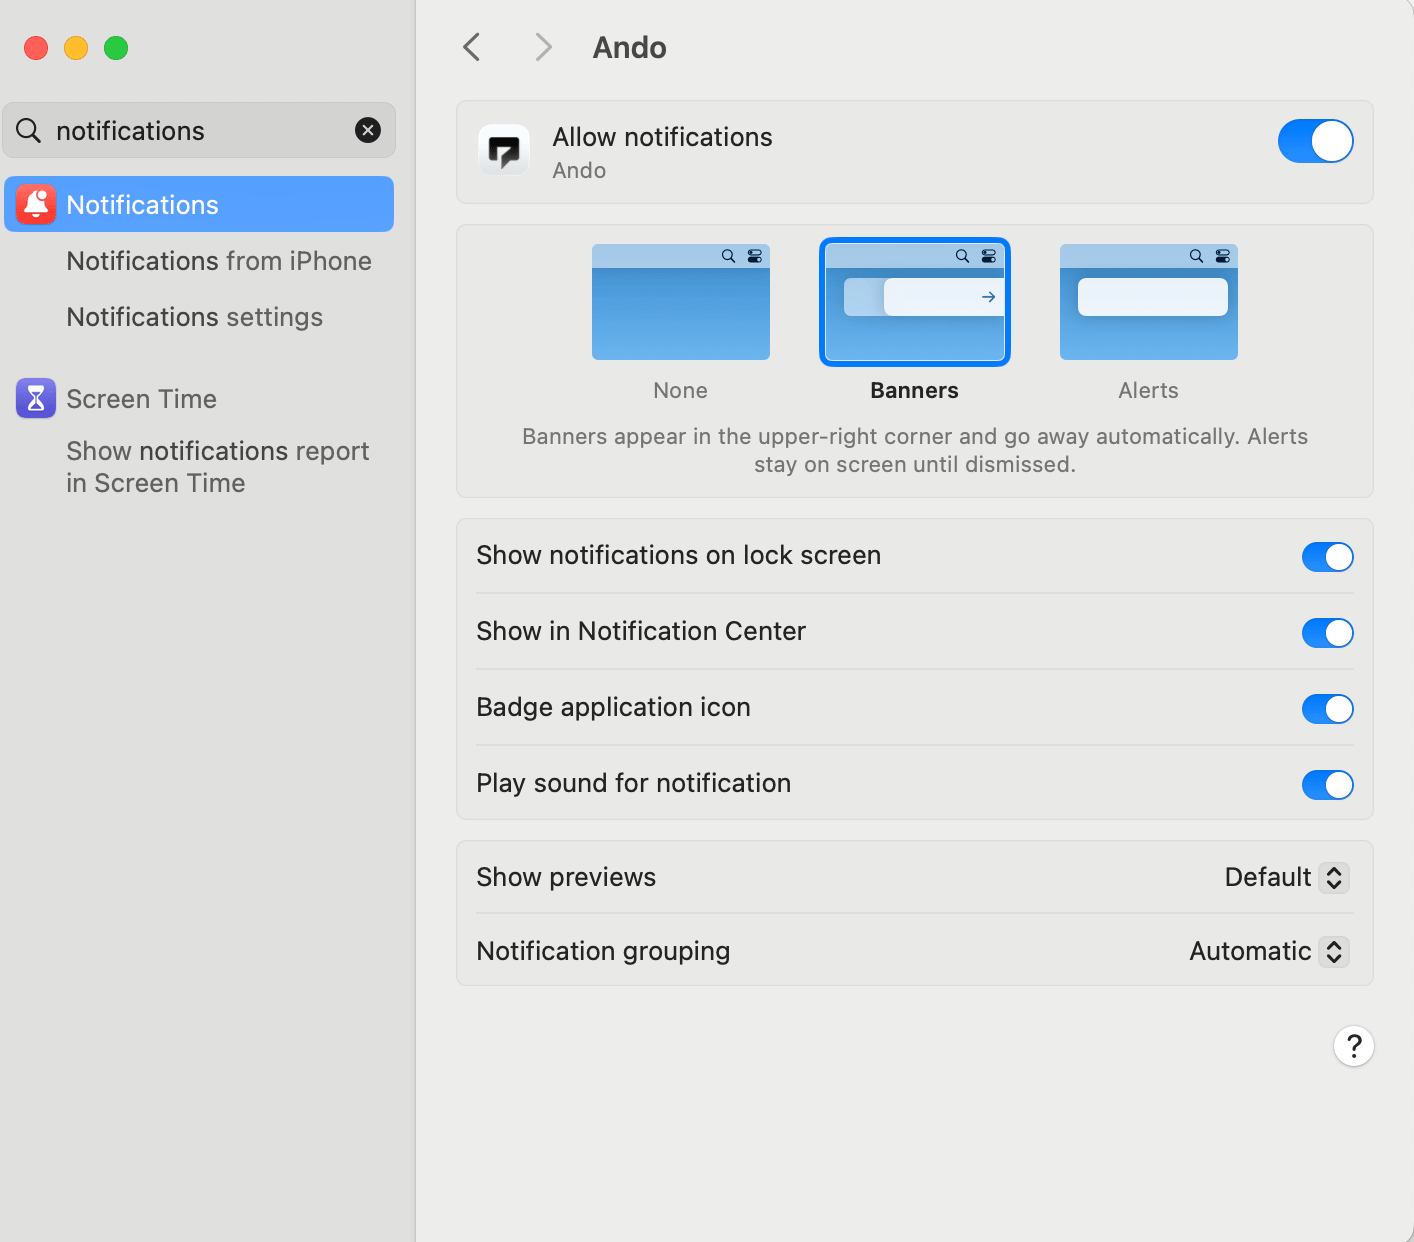
Turn microphone access back on
Turn microphone access back on
Go to Privacy & Security → Microphone and turn on Ando.
Then return to Ando.
Turn screen sharing back on
Turn screen sharing back on
Go to Privacy & Security → Screen & System Audio Recording and
turn on Ando. On some macOS versions, this is called Screen Recording.If your Mac asks you to quit and reopen Ando, do so. Otherwise, return to
Ando and select Restart and finish setup if it appears.